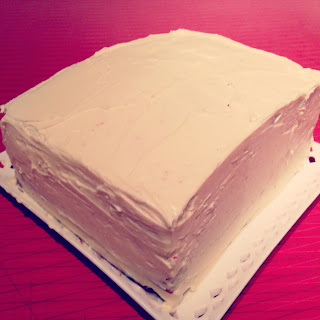
This week is a massive hub of activity at my work as the exclusive season of The Bolshoi Ballet opens. Almost everyone at work is somehow involved, and having The Bolshoi come exclusively to QPAC (ie NOWHERE else in Australia) is a big achievement. I'm mainly working on other projects, so not heavily involved, but wanted to congratulate my teammates with a cake that symbolised the Bolshoi. I could have played with something vodka infused, or done the Pavlova to link to the first Bolshoi Australian visit, but I wanted to do something that linked to "Big" and "Red" - a Red Velvet Cake. I know red velvet feels more American than Russian, however it is red, it is big, and it will impress!
The main reason I've avoided red velvet in the past is because that on my first red velvet experience, I could taste the food colouring. I hate the taste of food colour and that turned me off. So, wanting to make something special for the Bolshoi but avoiding that bad food colouring aftertaste, I started a search online for a great red velvet recipe with minimal red food colouring. Most recipes called for 2 or 3 ozs (up to 6 tbs) of red food colouring, which was way too much for my liking. Then, via tastespotting, I found a recipe that required just 1 tbs. It even called it a "sexy" red velvet, so I went with that.
As always, I made the cake with my son. He got so excited when we added the red food colouring and cocoa, as it change the cake from ordinary to "OH MY GOD, LOOK AT THAT COLOUR!" We definitely had fun making this cake, so much so, I might try red velvet again. ENJOY!
Bolshoi Red Velvet Cake
Adapted from Food and Photo
120 grams unsalted butter, at room temperature and cubed
330g caster sugar
2 large eggs
2 tbs red food coloring (I want a BIG red colour)
1/4 cup dutch cocoa powder
3 1/2 cups plain flour
1 1/2 tsp baking powder
1 tsp salt
1 tsp baking soda
2 tsp vanilla
2 cups buttermilk (or 2 cups milk and juice of 1 x small lemon into the milk. Allow to sit for about 5 minutes before adding to your batter. This is the cheaper alternative to buttermilk)
Preheat oven to 180 C. Grease a retangular lamington tin (best if you have two, but I only had one so had to bake in batches).
Beat butter and sugar until smooth and sugar has dissolved. Mix in one egg at a time, beating after each addition. Turn mixer off and add food coloring and cocoa powder to bowl. Turn on low until just incorporated and then beat on medium until smooth.
Sift together the flours, salt, and baking soda and set aside. Stir buttermilk and vanilla together. Add dry ingredients to the bowl in three batches, alternately with the buttermilk in two batches. Beat on medium until just combined. Add sour cream and vinegar and beat on low until combined.
Fill tin with half the batter and bake for about 20 minutes (or until a skewer can be inserted and comes out clean). Remove from oven and allow to sit for 5 minutes before removing from pan and allowing to cool on a baking rake. Repeat baking with remaining mixture. Cool completely before icing.
 Cream Cheese Frosting
500g cream cheese, soften
50g butter, softened
2 tsp vanilla
1 cups icing sugar, sifted
2 tbs milk
Cream cream cheese, butter, and vanilla on med-high speed until smooth and the butter is completely incorporated into the mix. Sift the icing sugar into the bowl then beat on low until smooth. Add the milk, a tablespoon at a time, until you have your desired consistency.
Assembly
Cut the cakes in half, length ways, so you have 4 smaller rectangles. Place your bottom layer on your serving plate and spread a tablespoon or two of icing over the top. Repeat with remaining layers. Coat the sides and top of the cake with remaining cream cheese (you might like to lightly do the cake, pop in the fridge to harden for 15 minutes, then ice with the remaining cream cheese to get a thick, smooth effect). ENJOY!


No comments:
Post a Comment